In the AlarmNet
360 home page, click the  icon.
From the list, select Checklist.
icon.
From the list, select Checklist.
The Checklist option helps in validating the Installation Quality by verifying the configuration done by the Installer during commissioning.
The Checklist page lists the checklists, along with the checklist Name, Description, Created On, and Created By.
To search for a checklist:
In the AlarmNet
360 home page, click the icon.
From the list, select Checklist.
The Checklists page appears.
Type the Checklist Name in the search bar and then press Enter.
The relevant checklist, with all the details, is listed.
The New Checklist option enables you to create a new checklist.
To create a new checklist:
In the Checklists page, click New Checklist. The Checklist page appears.
Enter the following details.
Name: Type the name of the checklist.
Description: Type the description for the checklist.
|
Note: You can search through the list of configured rules or categories. Type the rule name and then press Enter. The rule, along with the configured detail, appears. |
Under AVAILABLE RULES, click to add a new rule.
|
Note: Whenever you configure a new rule, the CONFIGURATION DETAILS are updated alphabetically. |
For example, to create AlarmNet Services rule, navigate
Click AlarmNet Services > Lyric Lock.
On the right pane, under CONFIGURATION DETAILS, the selected rule appears.
Similarly, you can add and configure multiple rules.
|
Note: Rules that can be used only once becomes inactive after configuration. However, there are few exceptions for certain rules and can apply the same rule for a different condition. |
You can select parameters and set conditions for the following:
By default, the first drop-down, Rule Name, is disabled.
The second drop-down, Logic, enables you to select a condition for the rule.
Based on the selected rule and condition, you can set the third column, Value, with the relevant parameter.
A few examples are described below.
To convert the following requirement
'Partition' as a rule in the user interface, you must perform the following:
By default, the first drop-down, is set to Rule Name as Auto Stay Arming.

From the second drop-down, select to set the Logic for the parameter.

From the third drop-down, select a value for the condition.
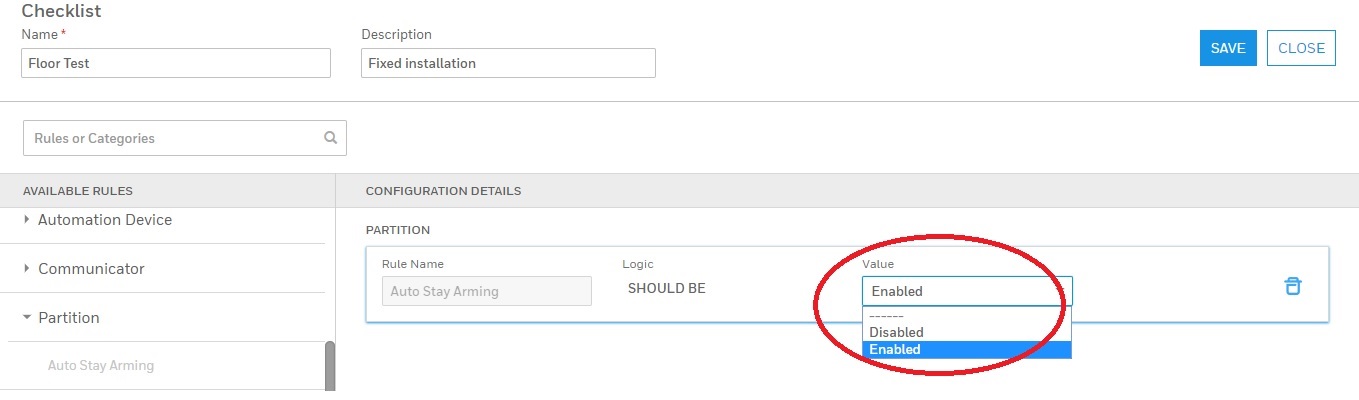
Click SAVE.
To convert the following requirement
'Sensor’ as a rule in the user interface, you must perform the following:
By default, the first drop-down, is set to Rule Name as Device Type.
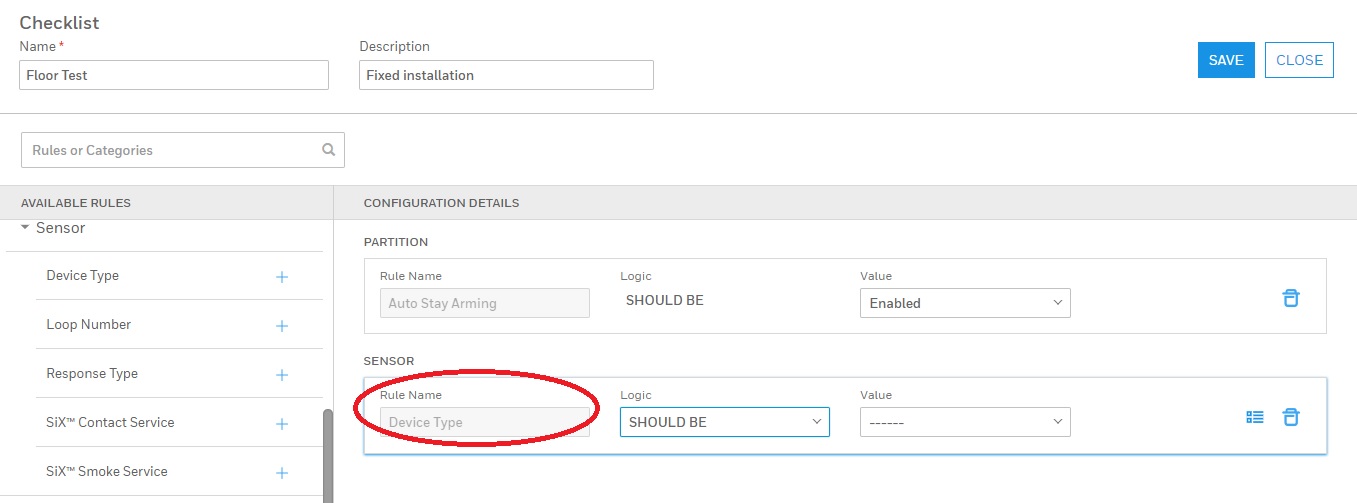
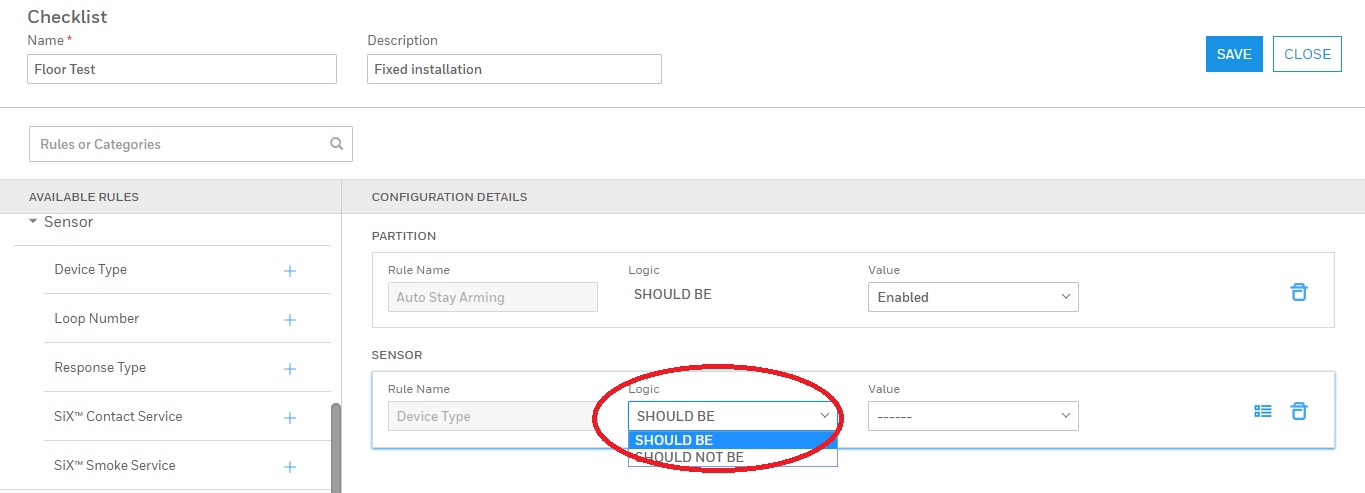
From the second drop-down, select to set the condition for the parameter.
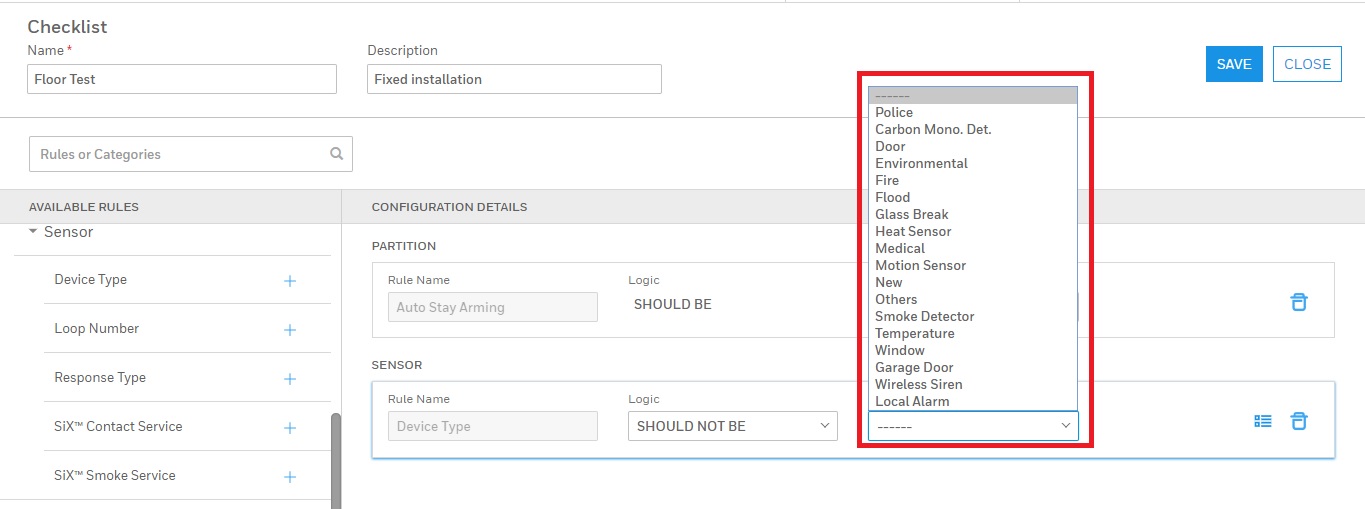
From the third drop-down, enter a value for the condition.
Click
the  icon to add a condition for the parameter.
|
Notes: You can click the:
|
Under Condition Name,
From the first drop-down list, click and select Condition Name.
From the second drop-down list, click and select the logic as IS.
From the third drop-down list, click to set the Value to Entry Exit 1.
|
Note: To
enable the |
Click
the ![]() icon to
add an additional condition.
icon to
add an additional condition.
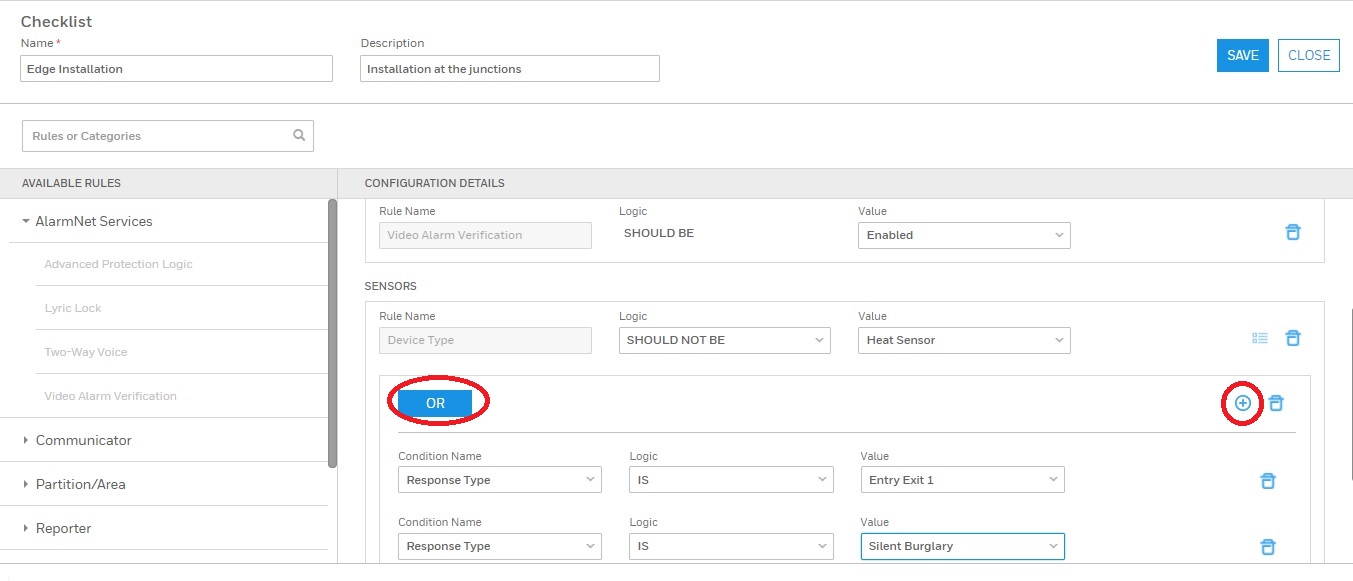
Configure the Condition Name, Logic, and Value.
Click
the ![]() icon to
add an additional condition.
icon to
add an additional condition.
Configure the Condition Name, Logic, and Value.
Click SAVE.
To convert the following requirement
‘Automation Device’ as a rule in the user interface, you must perform the following:
From the first drop-down, select to set parameter as Device Name.
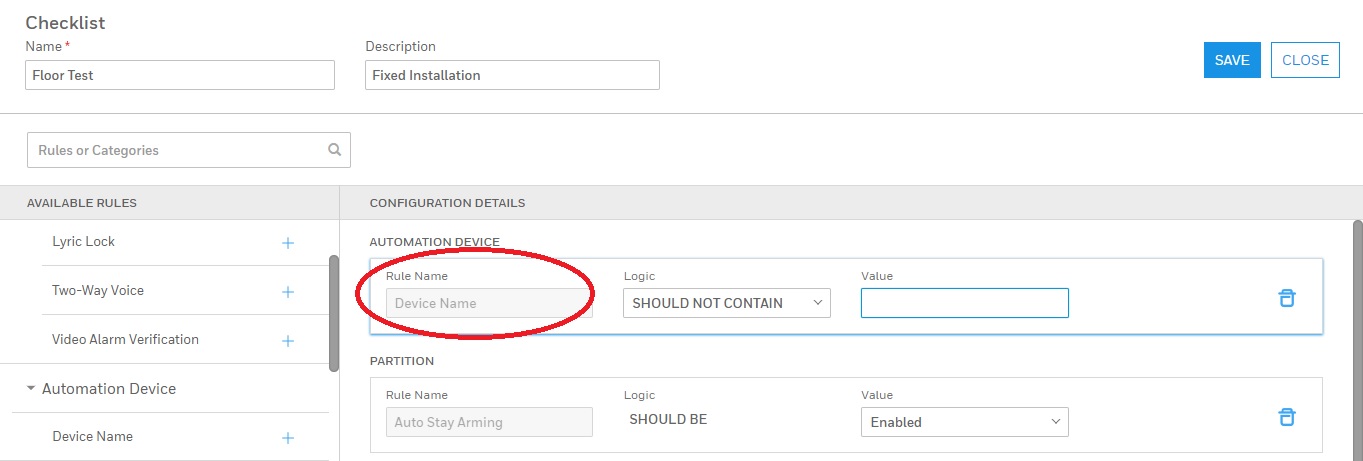
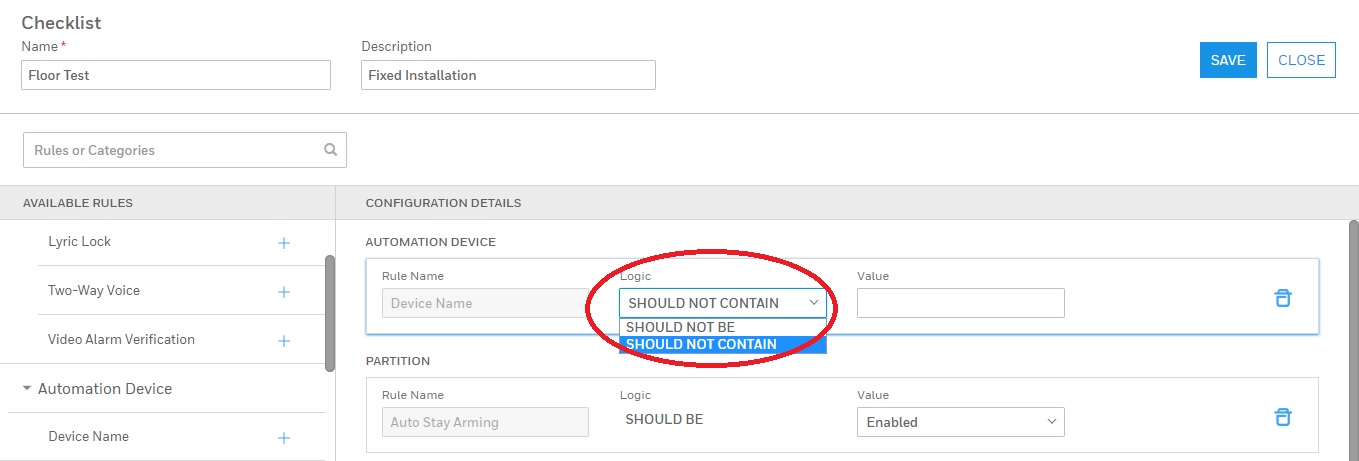
From the second drop-down, select to set the condition for the parameter.
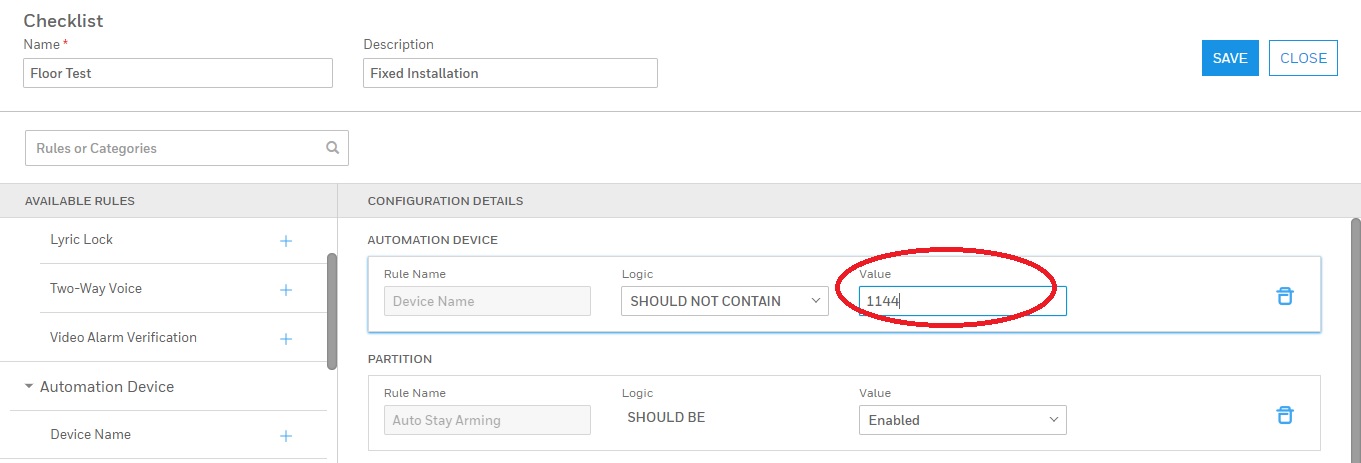
From the third drop-down, enter a value for the condition.
Click SAVE and then click CLOSE.
With the relevant access permission, you can edit the existing checklists.
To edit a checklist:
From the checklists
list, click the ![]() icon
against the relevant checklist. The Checklist
page appears.
icon
against the relevant checklist. The Checklist
page appears.
You can edit the following options available in the Checklist page.
Name
Description
Value
Click SAVE and then click CLOSE.
With the relevant access permission, you can delete the existing checklist.
To delete a checklist:
From the checklists
list, click the ![]() icon against the relevant checklist.
icon against the relevant checklist.
A warning message appears.
Click YES to confirm the deletion.
 condition, you need to add two or
more conditions.
condition, you need to add two or
more conditions.